After many weeks of what seems like slow progress, the project is now accelerating. Today I stood up the cabinet for the first time and cut all the remaining boards. I decided to stand the cabinet up with the boards I won’t need to stain and varnish, and I decided to do this step before varnishing the sides, although I still plan to stain and varnish everything else before assembly proper.
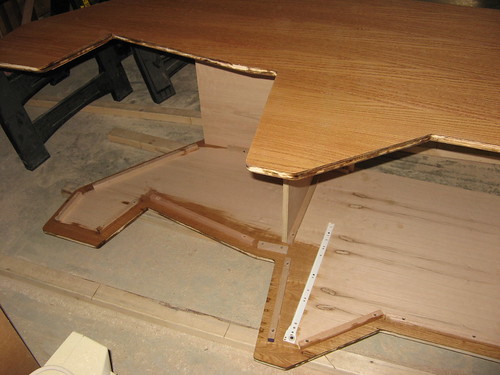
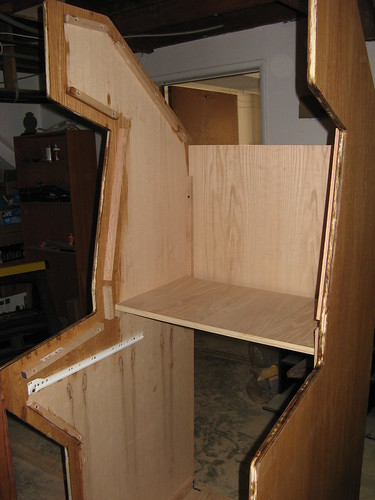
As you can see, I also fitted the keyboard tray runners and the remaining ledgers for the control panel, monitor shelf, and bezel. I slotted the base into the dado on one side and secured it with brackets and 1-1/4″ coarse thread drywall screws. Then I secured one side of the monitor shelf on its ledger. After this I was ready to put the other side on top and likewise secure it. This gave me a good framework although it was still wobbly in the sideways direction of course, so I mounted the back panel to give it some proper strength. The base, monitor shelf and back panel will all be out of sight in the final cabinet, so these were the parts I didn’t need to stain and varnish.
I discovered that drywall screws are surprisingly hard to screw into (un-pre-drilled) oak plywood, but with a bit of brute force and the help of some clamps (clamps are my best friends in this project) I managed to get everything sorted. I also discovered that a circular saw baseplate angle of around 40 degrees is difficult to make a decent cut with, and that my initial top board was cut too long. That’s no problem though – I can always take more off!
I also slot-cut the edges of the boards that I plan to expose in the final assembly. Next steps are to cut the control panel holes, the speaker holes, and the subwoofer hole. I have a coin door, but I’m thinking I’ll skip mounting that for now. Once I have everything cut (hopefully tomorrow), I’ll be ready to stain the remaining wood (during the week if I can), varnish everything (next weekend), rig the control panel and assemble the cabinet just in time for Thanksgiving week when the in-laws arrive.
It’s looking great, and like a real cabinet at last. I love drywall screws, but I don’t sink anything anymore without a countersink first. I’ve split too much wood, and cracked the heads off of too many wood screws. I really don’t like wood screws anymore. I have a long, sad history of holes with headless screws lost within, and often it’s too difficult, or damaging to be worth trying to extract them.