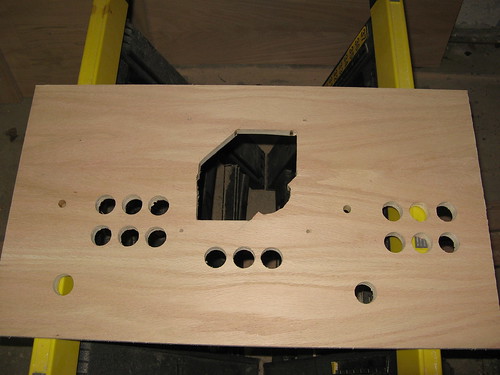
Today I tackled the control panel. I hadn’t done anything on paper; I just laid out the controls on the board I had cut. This turned out to be quite easy, although I had to pay attention to the mirrored-ness of the thing when I made cuts from the other side.
I started off by drilling some button holes (1-1/8″ spade bit) on the piece that I’ve codenamed “CPX” – the 3-1/2″ high piece that sits below the monitor bezel and directly above the CP. This is where I’m mounting the 1P and 2P start buttons, the Insert Coin button, and the Power button (which I’ll hook to the PC power switch). I had previously had mixed success using the spade bit with test drills, but I learned how to better do it: use a fresh battery in the drill, turn up the torque, and keep the bit at high speed.
I found a high speed is the key to the bit effectively clearing chips, and when I didn’t have the speed high enough, I frequently had to stop and clear the chips. Also, don’t press down too hard. The oak ply I’m using is 11 layers thick, and drill progress tends to go in layers. On a good drill, I’d be through in 15-20 seconds. A slow drill would take a minute or two. I also learned from my first hole that (as I suspected, really) the underside was torn up a bit on breaking through. I wasn’t drilling against sacrificial wood, which would have helped that. A couple of times, the drill jammed as only half of the hole snapped away at the bottom and the remaining half was too thick to snap away, leaving me having to chisel the piece out from underneath.
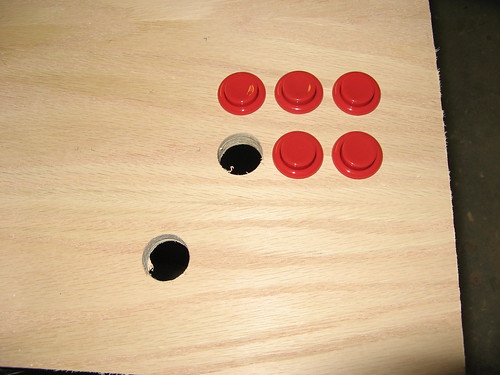
Here’s a shot of the CP with some initial button holes. I popped some buttons in as a test and to make the picture interesting.
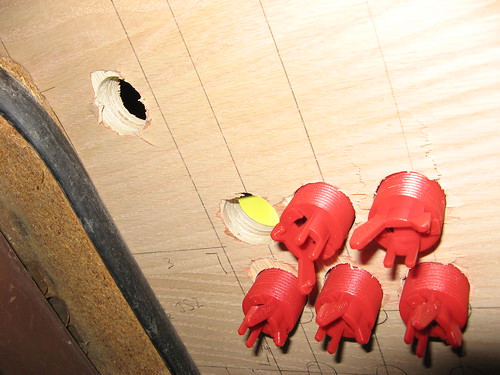
Here’s the same shot from the underside of the CP. You can see the exit wounds, and some of my layout design on the flip side.
The trackball is huge: the ball itself is 3″ in diameter, and the mounting plate is 7-1/2″ square. I routed and jigsawed the slot for it after drilling the button holes, and finally routed holes for the joysticks. Here’s the completed (as far as holes) panel.